Winter magic in Anchorage comes with a reality check—ice, wind, and short daylight hours. That combo makes holiday lighting a little more technical than simply hanging a few strands. With the right plan, though, you can create a bright, inviting display while protecting people, shingles, wiring, and your power circuits. Below is a practical, step-by-step approach to Anchorage Holiday Lighting Installation that keeps safety first and results strong all season.
If you’d rather leave the setup, takedown, and mid-storm fixes to a local crew, book an Anchorage Holiday Lighting Installation pro for a smooth, winter-ready display.
1) Pre-Season Check: Where Ice and Loads Build Up
Start with the roof and the yard, not the lights.
- Roof edges and valleys: These trap snow and form icicles. Plan your light lines to avoid areas where falling ice will shred bulbs or pull on clips.
- Downspouts and gutters: Verify they’re clear. Ice blocking a downspout can push meltwater behind fascia—even more risk if cords clog the channel.
- Power access points: Identify exterior GFCI outlets. If you only have standard outlets, schedule an upgrade before you run multiple strands.
- Footing zones: Choose ladder spots with solid traction and wide clearance. Mark the no-go areas where snowmelt refreezes into slick patches.
Tip: Photograph the roof from the ground. Mark likely ice-fall zones and sketch an alternate light path that keeps cords and bulbs out of the “shatter belt.”
2) The Right Gear for Anchorage Conditions
Anchorage winters demand cold-capable tools that won’t crack, slip, or corrode.
- Ladders: A Type I or IA extension ladder with wide feet. Add ladder mitts to protect gutters and a stabilizer bar for better contact.
- Footwear and gloves: Deep-lug, cold-rated boots and insulated, grip-equipped gloves. Thin liners improve dexterity with clips and bulbs.
- Clips and anchors: Use roof-specific plastic clips designed for shingles, gutters, or drip edges. Avoid metal clips that can scratch finishes or freeze to surfaces.
- Cords and lights: Outdoor-rated only. Cold-rated LED stringers handle Anchorage temps better and draw far less power than incandescents.
- GFCI and timers: GFCI protection is a must. Pair with a photo-sensor timer or smart plug rated for outdoor use.
Pro move: Keep a small “edge kit” in a chest pocket—10 extra clips, a mini screwdriver, twist ties, and a few spare bulbs—so you aren’t climbing up and down for tiny fixes.
3) Load Planning: Power Without Trip-Hazards
Even with efficient LEDs, poor planning can overload a circuit or tangle cords into trip lines.
- Circuit check: Know the amperage of your exterior circuit. Assign a safe load budget for total strands, timers, and any inflatables.
- Strand math: Follow the manufacturer’s “max end-to-end” limit for each light type. LEDs allow longer runs, but don’t mix different strand types on one chain.
- Distribution: Split your display across multiple outlets if available. Where that’s not an option, run a heavy-duty, outdoor-rated extension cord from a separate GFCI circuit in a protected path.
- Cable routing: Use drip loops and keep connections off the ground; elevate them on hooks or bricks, and cover them with in-use covers.
Keep a diagram (even a simple sketch) of what’s plugged where; it saves guesswork if a strand goes out after a storm.
4) Ladder Safety on Snow and Ice
Ladders plus ice is where most accidents happen—treat setup like a jobsite.
- Base prep: Pack and rough up the snow to create a textured pad. If you’re on ice, sprinkle traction granules or use rubber ladder mats.
- Angle and tie-off: Use the 4:1 rule (one foot out for every four feet up). When possible, tie the ladder to a stable anchor point.
- Three points of contact: Always. Keep tools in a belt pouch or hoist in a bucket; don’t carry them up in your hands.
- Spotter: Have an adult spotter. If wind gusts exceed safe limits or fresh freezing rain starts, climb down and pause.
Never climb onto steep or icy roof planes. If a strand requires stepping onto a slick surface, that’s a sign to call an Anchorage Holiday Lighting Installation professional.
5) Roof-Friendly Attachment Methods (for Shingle, Metal, and Flat Roofs)
Different roof types need different clip strategies to avoid damage.
- Asphalt shingles: Slide shingle-friendly clips under the shingle edge or along drip edges without lifting tabs. Avoid nails, staples, or screws in the roof deck.
- Metal roofs: Use magnetic light clips or gutter clips; avoid scratching finishes. Don’t clamp where ice sheets tend to release.
- Flat roofs: Keep lights to parapets, facia edges, and railings. Avoid horizontal runs across the roof—these become snare lines for shovels or snow removal crews.
Gutters can work for runs if they’re structurally sound and ice isn’t a frequent issue. If you regularly see heavy icicles, choose fascia or soffit edges with snow-shedding clearance instead.
6) Cord and Connection Protection
Cold makes plastics brittle and seals less forgiving. Protect every junction.
- Weatherproof covers: Use “in-use” bubble covers for outlets to keep the plug protected while energized.
- Elevation: Keep plug connections off the ground and away from gutter downspout discharge paths.
- Drip loops: Ensure water runs away from the connection. A simple slack loop often prevents nuisance trips.
- Strain relief: Tie a short loop around a clip before the plug connection to keep wind from tugging directly on the joint.
After storms, quickly inspect junctions for tension, iced caps, or pooling meltwater.
7) Working the Weather Window
Timing matters in Anchorage’s fast-changing conditions.
- Install before deep freeze: Aim for a calmer window ahead of sustained sub-zero snaps. Clips and insulation handle bild cold. better
- Wind watch: Anchorage winds can whip cord runs. Use extra clips on windward eaves and keep spans tight to the edge.
- Icefall: After a warm-up and refreeze, expect icicle shedding; verify that no light lines sit directly in fall paths.
If a storm rolls in midway, secure any loose runs, unplug, and resume when footing improves. No display is worth a fall.
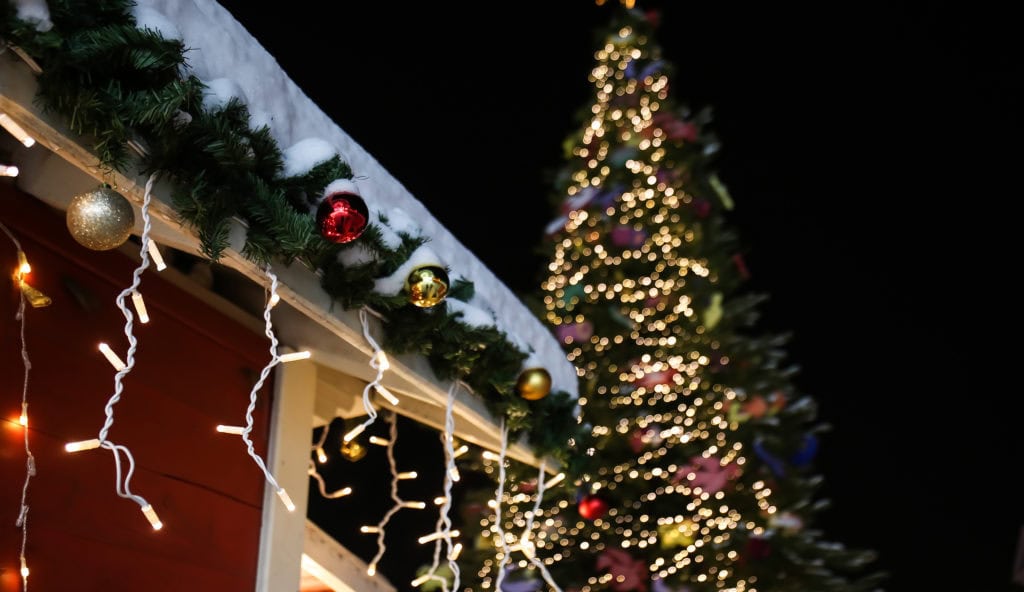
8) Lighting Design That Survives Winter
Make it look good—and built to last the season.
- Less is brighter: Outline clean architectural lines and one or two features (a door, a gable, a key tree). In harsh weather, fewer runs mean fewer failure points.
- Warm white baseline: Warmer LEDs read cozy against snow and look consistent across brands.
- Layered circuits: Put rooflines on one timer, yard features on another. If a section trips, the rest stays lit.
- Avoid ladder-dependent props: Items that need daily tweaks are frustrating in wind and darkness.
Think visibility from the street and from inside the home. A modest, tidy outline often outshines complex displays in Anchorage conditions.
9) Smart Controls, Timers, and Energy Savers
Make the system hands-off and efficient.
- Photo-sensor timers: Auto-on at dusk, off at set hours. Reduces standby usage and late-night glow.
- Smart outdoor plugs: Useful for separating zones and checking energy draw, as long as they’re outdoor-rated and in protected locations.
- Scheduled windows: In mid-winter, two lighting blocks (evening and pre-dawn) can be festive without running all night.
- LED everywhere: The energy savings, low heat output, and durability are ideal for Anchorage’s cold weather.
Label plugs and timers with painter’s tape to quickly isolate circuits during troubleshooting.
10) Ground Displays and Walkway Safety
Keep paths clear and highlight edges.
- Stake lights and markers: Define walkway edges to prevent guests from stepping into crusted snowbanks.
- Inflatables and figures: Anchor with multiple stakes and short guy lines; place away from roof edges that shed snow.
- Extension cord crossings: Bridge with cord covers or route around paths. Don’t bury live cords under snow where shovels will hit them.
If you salt or use de-icer, choose products that won’t attack cord jackets or corrode metal stakes.
11) After-Storm Inspection Routine
Anchorage weather will test your setup. Make inspections part of the plan.
- Visual pass: Look for sagging runs, missing clips, or sections out.
- Touch check (power off first): Feel for tight cords trapped under ice. Free them gently—don’t yank.
- GFCI reset: If a zone is down, check the GFCI. Persistent trips signal moisture at a connection that needs drying or re-routing.
- Clip top-offs: Add a few extra clips where wind worked a span loose.
Keep a small bin by the door with spare clips, zip ties, and a dry towel for quick fixes.
12) Takedown and Storage That Protects Next Year
A careful takedown saves next season’s budget and headaches.
- Wait for better footing: Choose a clear day with stable temps and safe ladder bases.
- Unplug first, then detach: Work from the plug backward to avoid leaving hot sections live.
- Coil by zone: Wrap strands loosely on reels or cardboard frames; label by location (e.g., “north eave,” “garage gable”).
- Dry and bin: Let cords and lights dry before storing. Use lidded bins to keep moisture out.
Note which clips are reusable and where replacements will be needed next season. That five-minute note makes next year much faster.
13) When to Call the Pros
Some homes, roof pitches, and icy exposures simply aren’t DIY-friendly. If you have a steep roof, metal panels with regular ice-sheet release, tall gables, or limited safe ladder footing, bring in a local team. A professional Anchorage Holiday Lighting Installation crew brings:
- Proper ladders, stabilizers, and fall-protection practices
- Cold-rated lights, clips, and outdoor-safe power distribution
- Clean, symmetrical designs that hold up in wind and storm cycles
- Scheduled mid-season checks and safe takedown once the holidays pass
It’s also just nice to enjoy the lights without worrying about ice on the eaves.
Quick Planning Checklist (Clip and Save)
- Roof and gutter inspection complete
- Exterior GFCI confirmed and labeled.
- Light types chosen and total load calculated
- Ladder stabilizer and traction mats are ready.
- Roof-appropriate clips selected (no nails/staples)
- Cable plan set with drip loops and elevated joints
- Timers/smart plugs labeled and tested
- Weather window chosen and spotter scheduled.
- After-storm inspection routine noted
- Storage bins ready for takedown
Why Local Knowledge Matters in Anchorage
Anchorage’s freeze-thaw cycles, gusty winds, and unpredictable storm tracks call for details that generic guides miss—like where icicles build on your specific roofline, which eaves catch the prevailing wind, or how to route cords away from meltwater paths that refreeze at dusk. Partnering with a local, year-round Anchorage Holiday Lighting Installation provider ensures your display looks great, stays safe, and handles our climate without constant ladder trips.
For planning, installation, or a fresh design, reach out to the team at Be Happy Property Services to schedule your holiday lighting and seasonal support.
FAQs
1) Do I need GFCI outlets for exterior holiday lights?
Yes. GFCI protection reduces the risk of shock in wet and icy conditions. If your exterior outlets aren’t GFCI-protected, have a qualified electrician install or update them before running multiple light circuits.
2) Can I hang lights on a metal roof in Anchorage?
Yes—use magnetic or gutter-mounted clips designed for metal, and avoid spots where ice sheets usually release. Never drill or screw into panels; it risks leaks and voids warranties.
3) How many LED strands can I connect end-to-end?
It depends on the manufacturer and strand type. Check the tag on each string and don’t mix different strand types on a single chain. When in doubt, split runs across multiple circuits.
4) What’s the safest time to install lights?
Choose a calm, daylight window before the deep cold sets in. Avoid active snowfall, high winds, or fresh freezing rain. If footing deteriorates mid-install, pause and resume when it’s safe.
5) Is professional installation worth it for a small home?
If your roof edges ice up, ladder footing is poor, or you’re short on safe helpers, a professional crew is the safer choice. You’ll get a tidy design, proper power management, and a reliable takedown plan.

Jacob Bishop is the founder and CEO of Be Happy Property Services. With a strong background in property management and customer service, Jacob has dedicated himself to creating a company that prioritizes client satisfaction and seamless property experiences. His extensive knowledge and hands-on approach have earned him a reputation for excellence in the industry. Jacob’s passion for real estate and commitment to happy living spaces make him a trusted leader in property services.