Why Anchorage Holiday Lighting Needs Its Own Safety Plan
Anchorage brings stunning winter nights—and uniquely slick conditions. Short daylight windows, wind, and freeze–thaw cycles turn basic tasks into high-risk jobs. Whether you’re lighting a single gable or outlining a two-story roofline, a safety-first plan protects you, your home, and your timeline.
If you prefer a done-for-you approach (design, install, maintenance, and removal), you can explore holiday lighting with Be Happy Property Services in Anchorage.
Pre-Check: Decide If DIY Is Truly Safe This Week
- Weather window: Aim for calm winds and temps that let you grip tools. If a storm is inbound, reschedule.
- Daylight math: Start early and plan to finish a section before dusk; visibility drops fast.
- Helper on-site: Never climb alone—have a spotter who can manage ladders, cords, and calls.
- Scope sanity: High, steep, or icy roof? Consider hiring a pro for upper levels and keep DIY to railings, porches, and shrubs.
Gear That Reduces Risk (Worth Having Before You Climb)
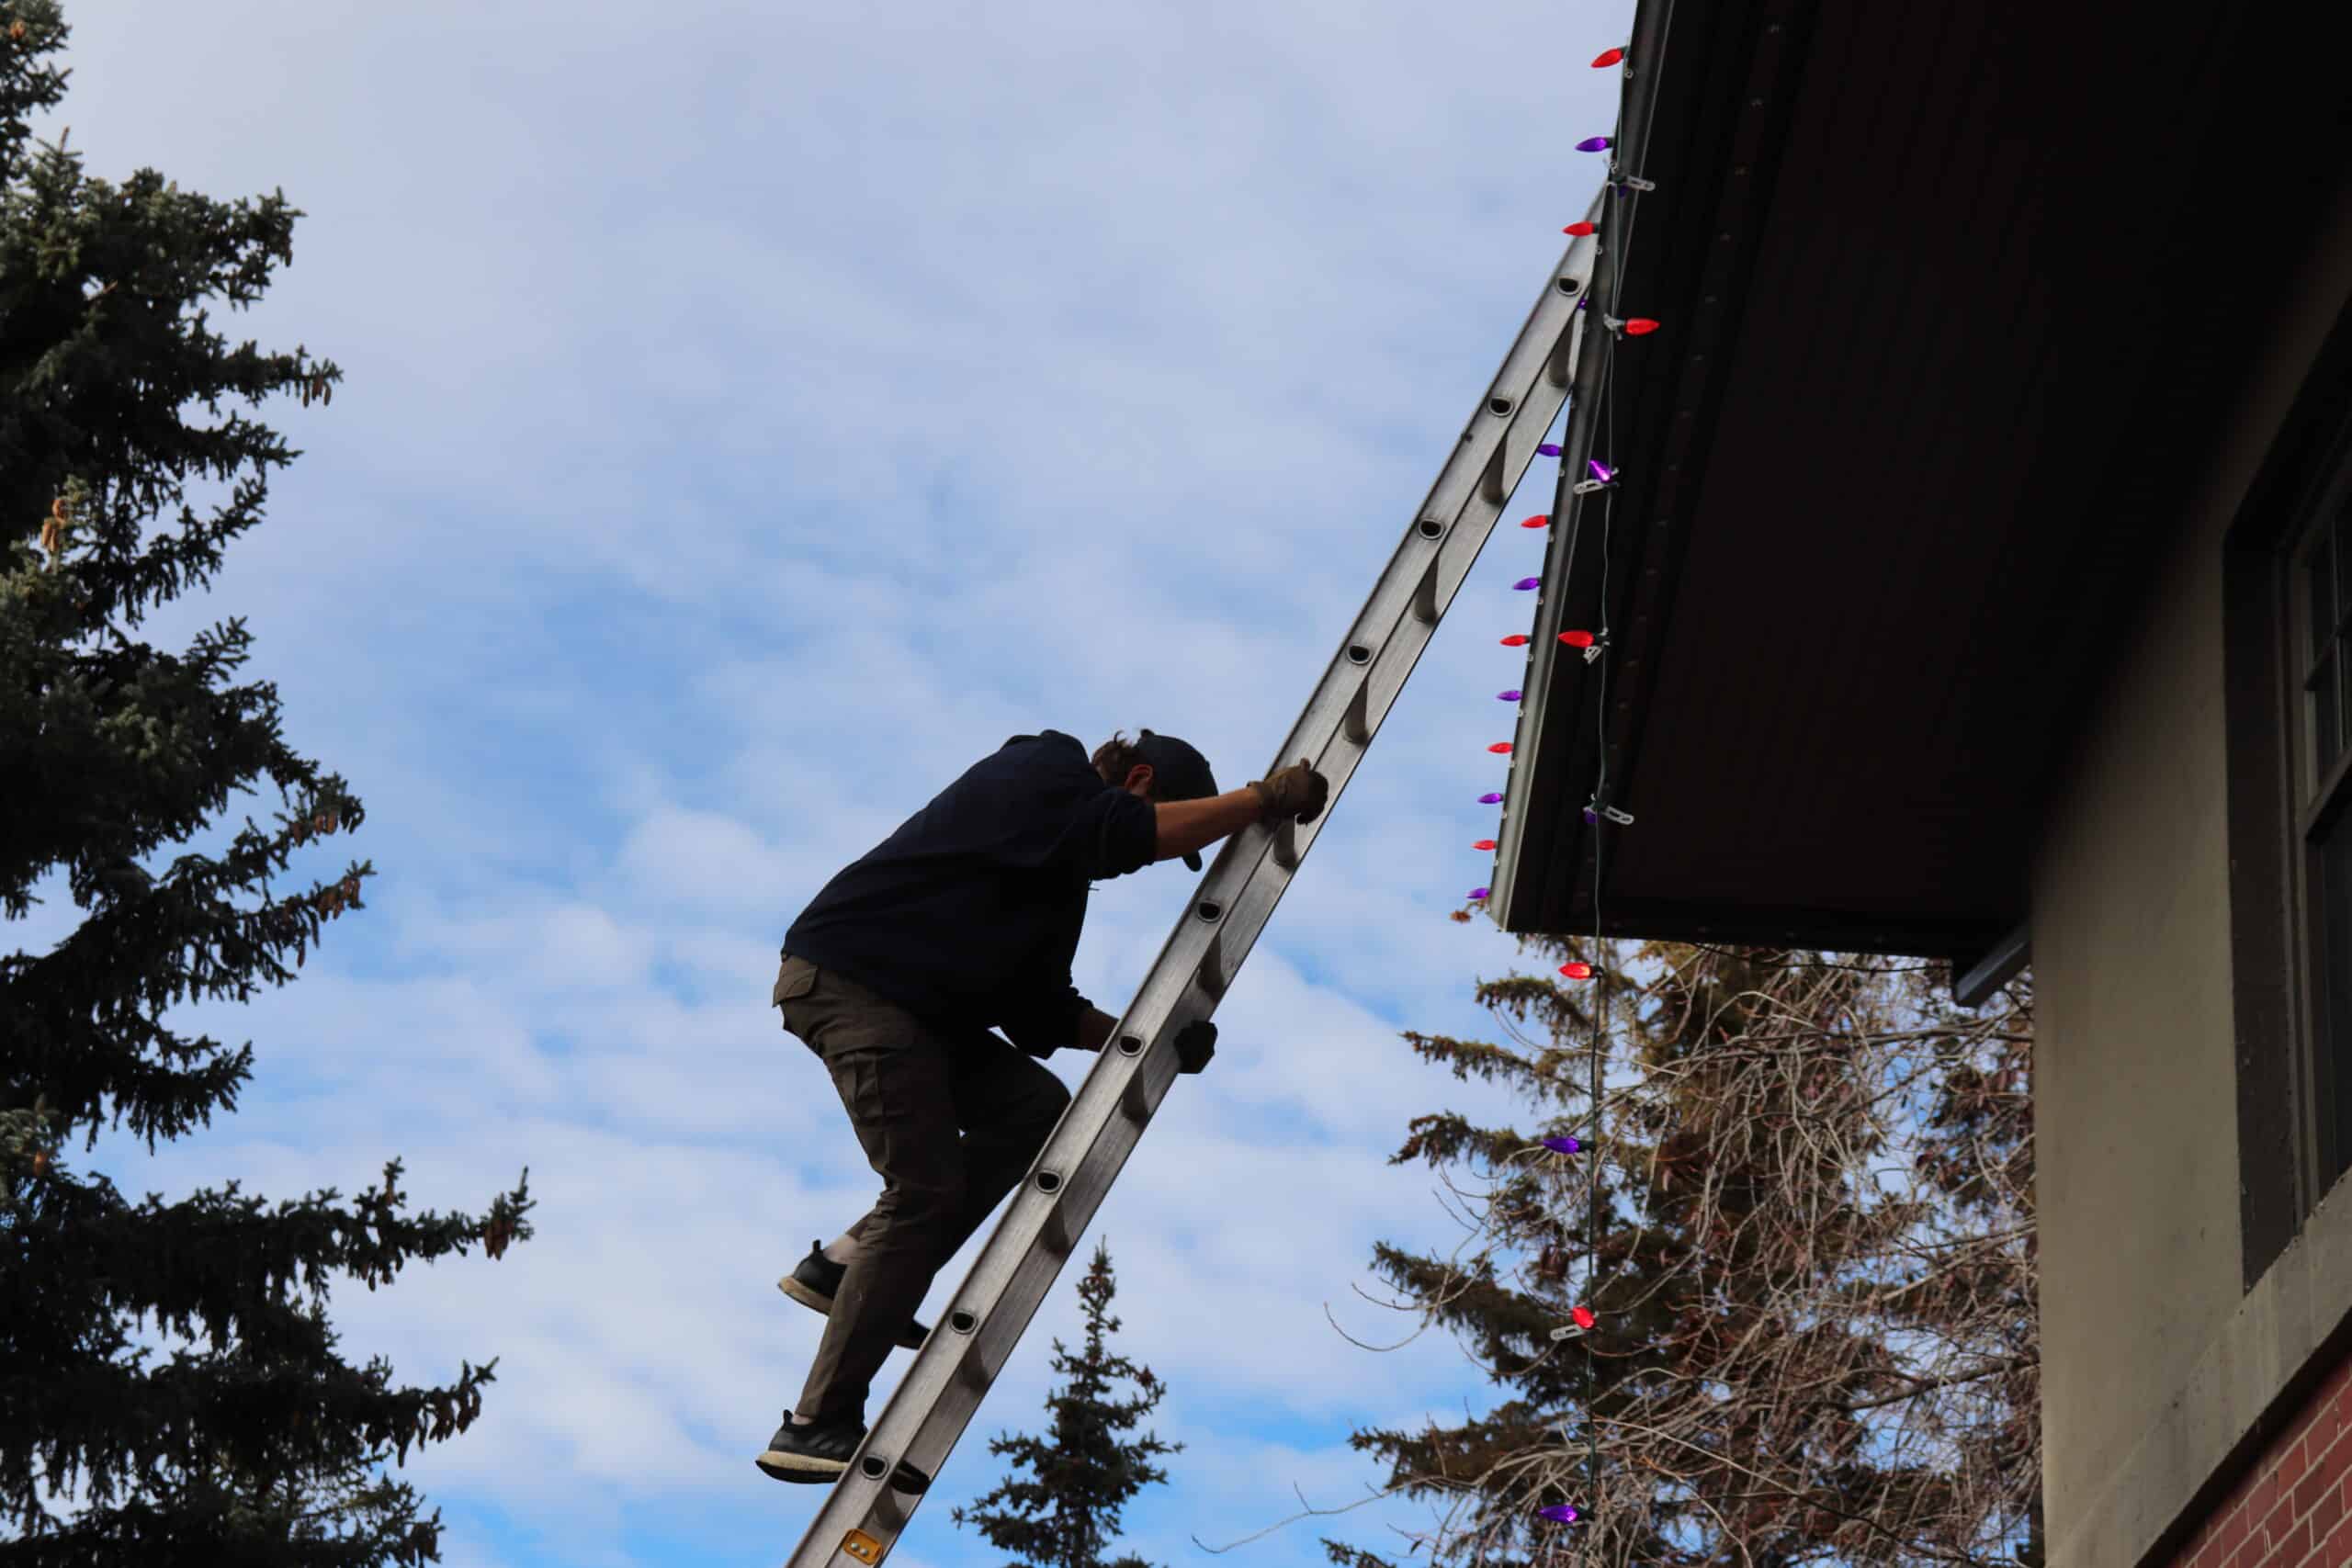
- Ladder with feet that bite: Look for slip-resistant feet and extend 3 feet above the step-off point.
- Stabilizer/stand-off: Keeps the ladder off gutters and improves balance on uneven siding.
- Cold-weather gloves with grip: Preserve dexterity without losing hold on clips and rungs.
- Roof-safe clips & commercial-grade LEDs: Cleaner lines, fewer mid-season fixes, less time at height.
- Non-slip boots with deep tread: Ice meets traction—choose soles that shed packed snow.
- GFCI outlets & outdoor-rated cords: Lower electrical risk in melt/freeze conditions.
- Headlamp: For late-afternoon checks without juggling a flashlight.
Ladder Placement: The 4×1 Rule (and What Changes on Snow)
Place the ladder at about 1 foot out for every 4 feet of height. In Anchorage, ground conditions complicate this:
- Clear and sand the landing zone before setup. Packed snow can quickly polish into ice.
- Use a wide, flat footprint—avoid soft berms and dip spots at the edge of driveways.
- Tie off at the top when possible, and have your spotter heel the feet during climbs.
- Move the ladder often. Reaching out to the side is the fastest way to lose balance.
Roof Edges, Gutters, and Eaves: Safe Attachment Tactics
- No nail guns or staples through shingles. Use roof-safe clips designed for eaves, gutters, and fascia.
- Work left-to-right (or right-to-left) in short zones. Finish 8–10 feet at a time, climb down, move the ladder, repeat.
- Manage cord strain. Keep gentle loops and a little slack at corners and ridge changes.
- Create drip loops at vertical drops to prevent meltwater from reaching connections.
Icy Roof Reality Check: When Not to Go Up
Skip roof walking if you see:
- Rime ice or glassy sheen on shingles or metal panels
- Wind gusts that threaten balance at height.
- Deep eave icicles (risk above and below)
- Active melt with slick runoff
If any of the above show up, switch to ground-based lighting (shrubs, railings, windows) or call a pro for roofline work.
Working Order That Keeps You Off the Ladder Longer
- Test all strands on the ground. Label by zone to avoid swapping at height.
- Pre-place clips along your starting run while you’re fresh and conditions are best.
- Mount the first strand, then connect the power once several feet of the strand are secure.
- Route to timers/GFCI with cords kept off walkways and away from roof shed areas.
Electrical Safety in Freeze–Thaw Anchorage Conditions
- Outdoor-rated cords and plugs only. Keep connections elevated and covered.
- Use GFCI outlets and avoid overloading circuits—LEDs help keep the draw low.
- Set timers for dusk to midnight (or your preferred window) so lights aren’t left on unattended all night.
- Avoid daisy-chaining across moving snow zones, like roof valleys that shed.
Ground-Level Wins: Big Impact, Less Risk
If roof work isn’t safe this week, emphasize:
- Porch and railing lines with warm-white roofline echo
- Path and entry lighting for better footing after dark
- Feature tree wraps (trunk + a few primary branches) for curb appeal, you can reach from the ground.
These zones deliver a lot of glow per minute of work and are easier to maintain mid-season.
Anchorage-Specific Hazards (and How Pros Handle Them)
- Wind corners: Extra clip spacing and tighter cable management at gables and ridges.
- Roof shed zones: Keep lights slightly inset from heavy-shed valleys or skip those spans.
- Icy driveways at the ladder base: Clear, sand, and recheck as the day warms and refreezes.
- Short daylight: Break the job into morning and early-afternoon sections; leave testing for last light.
For an end-to-end service that manages these details (and returns for in-season fixes), Anchorage homeowners often choose full-service holiday lighting.
DIY vs. Professional Install: Safety Tradeoffs
DIY advantages
- Lower upfront cost
- Flexible timing if a clear day appears
- Control over design details
Professional advantages
- Trained crews with fall-protection practices
- Roof-safe mounting systems and commercial-grade materials
- Faster installs, cleaner lines, and in-season maintenance
- Scheduled takedown when conditions are safe
If your roof is steep, high, or ice-prone—or you’re short on daylight—handing upper levels to a pro while you handle ground-level accents is a smart hybrid plan.
A Sample Safe-Install Checklist (Print This)
- Weather and wind checked for your time block
- Helper on-site with a charged phone
- Ladder feet on sanded, level ground; stabilizer attached
- Gloves with grip, non-slip boots, eye protection
- Clips, cords, and strands prepped and labeled.
- GFCI outlet and outdoor-rated timer ready
- Test strands before climbing; retest at dusk
Takedown Safety: Don’t Rush January
- Wait for a mild day if possible; plastic clips and cords are less brittle.
- Reverse the install pattern—ladder moves often, work in small zones.
- Coil and label strands by zone to speed up setup next season.
- Check gutters and eaves for any snow/ice buildup that might be disturbed.
Budget & Time Savers (Without Cutting Corners)
- Install early (late Oct–early Nov), when the footing is better; turn the lights on later if you prefer.
- Use consistent LED strands to avoid brightness and color mismatch—less troubleshooting at height.
- Choose a simple roofline + one focal feature. Fewer clips, fewer connections, cleaner look.
- Set smart timers so you don’t climb back up to tweak schedules.
When to Call a Pro Immediately
- Steep or multi-story roofs without safe tie-off points
- Persistent ice along eaves or metal roofing
- No safe ladder landing due to slope or ice
- Tight timelines with storms in the forecast
Be Happy Property Services can handle holiday lighting design, safe installation, mid-season fixes, and careful takedown—so you enjoy the glow without the ladder risk.
FAQs
1) What’s the safest ladder angle for holiday lighting?
Set the base about 1 foot out for every 4 feet of height on cleared, sanded ground. Extend the ladder 3 feet above the step-off point and use a stabilizer.
2) Can I install lights if my shingles are icy?
Avoid it. Shift to ground-level lighting or schedule a pro. Icy shingles and wind are a high-risk combo.
3) What clips should I use on gutters and shingles?
Use roof-safe, non-penetrating clips designed for eaves/gutters. Don’t staple or nail through roofing or fascia.
4) How do I keep cords safe in Anchorage’s freeze–thaw?
Use outdoor-rated cords and GFCI outlets. Keep connections elevated with drip loops and covered from meltwater.
5) What if a bulb goes out after a storm?
Test connections at ground level first. If the issue is on a steep or high roof or in icy conditions, wait for a safe window or book a maintenance call with a pro.

Jacob Bishop is the founder and CEO of Be Happy Property Services. With a strong background in property management and customer service, Jacob has dedicated himself to creating a company that prioritizes client satisfaction and seamless property experiences. His extensive knowledge and hands-on approach have earned him a reputation for excellence in the industry. Jacob’s passion for real estate and commitment to happy living spaces make him a trusted leader in property services.